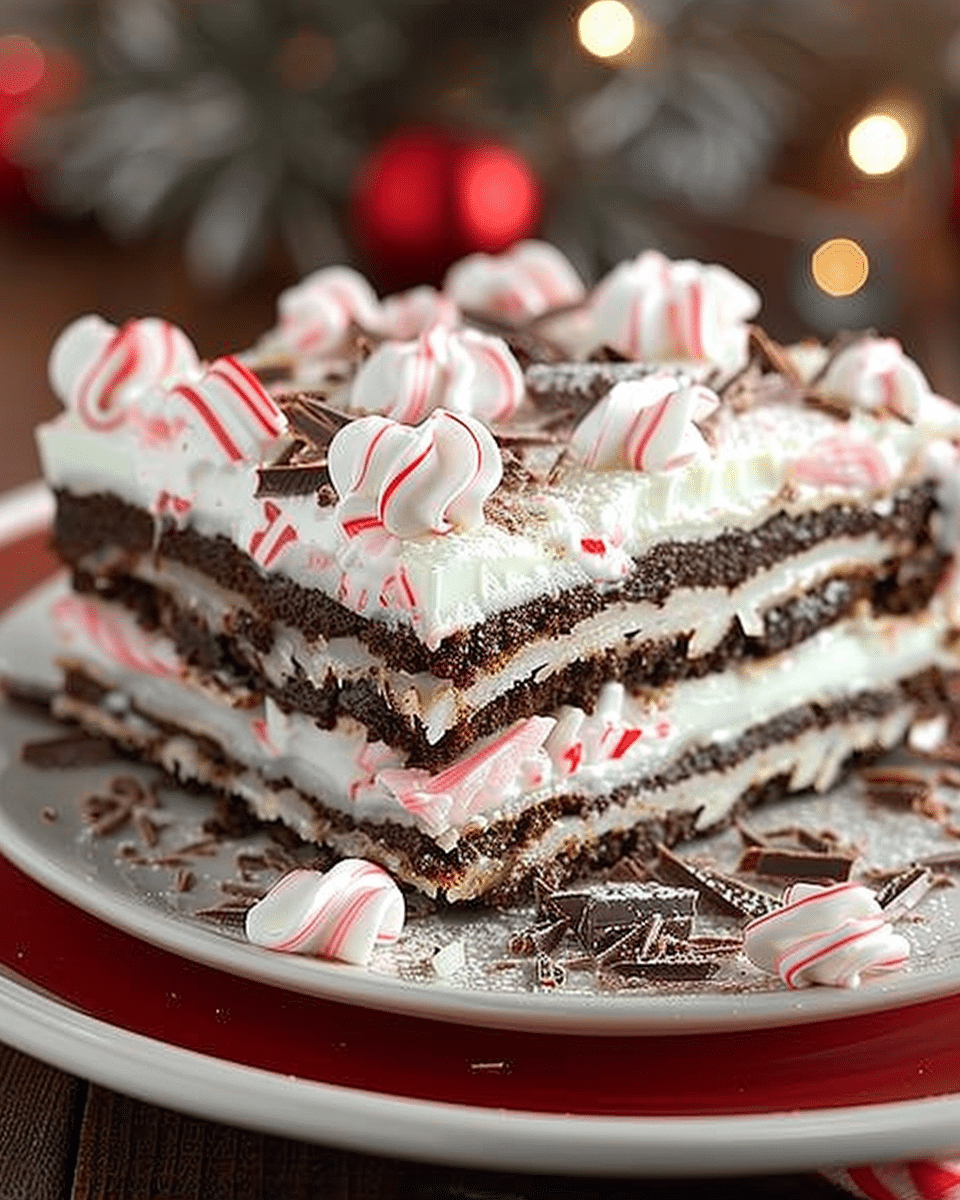
This festive no-bake chocolate peppermint lasagna is a holiday dessert that combines all the best flavors of the season. With layers of crushed Oreo crust, creamy peppermint cheesecake, decadent chocolate pudding, and topped with whipped cream and crushed candy canes, it’s sure to become a family favorite. Perfect for holiday gatherings, this dessert is easy to make and guaranteed to impress!
Why You’ll Love This Recipe
This dessert is an absolute showstopper for the holidays. The combination of rich chocolate, refreshing peppermint, and crunchy candy canes provides the perfect balance of flavors and textures. Not only is it visually stunning with its layers of creamy filling and whipped topping, but it’s also incredibly easy to make since it's a no-bake dessert. The Oreo crust adds a delightful crunch, while the peppermint cheesecake layer offers a smooth, creamy bite, and the chocolate pudding layer rounds out the dessert with its rich chocolate flavor. It's the ideal treat for Christmas parties, potlucks, or just a cozy family dessert at home.
Ingredients
Oreo Crust:
- 36 Oreo cookies
- ½ cup unsalted butter, melted
Peppermint Cheesecake Layer:
- ½ cup unsalted butter, softened
- 12 oz cream cheese, room temperature
- 1 ½ cups powdered sugar
- 1 teaspoon vanilla extract
- 1 teaspoon peppermint extract
- 1 ½ cups whipped topping (Cool Whip)
- ½ cup crushed candy canes
Chocolate Pudding Layer:
- 2 packages (3.9 oz each) instant chocolate pudding mix
- 2 ¾ cups whole milk
Topping:
- 2 ½ cups whipped topping (Cool Whip)
- ¼ cup crushed candy canes
(Tip: You'll find the full list of ingredients and measurements in the recipe card below.)
Directions
-
Prepare the Crust: In a food processor, crush the Oreos (including the filling). Mix the crushed Oreos with melted butter and press the mixture firmly into the bottom of a 9x13-inch dish. Chill in the fridge while you prepare the other layers.
-
Crush the Candy Canes: Unwrap the candy canes and place them in a zip-lock bag. Use a rolling pin to crush the candy canes into small pieces for topping and the peppermint cheesecake layer.
-
Make the Peppermint Cheesecake Layer: In a large bowl, beat the softened butter, cream cheese, powdered sugar, vanilla extract, and peppermint extract until smooth and creamy. Gently fold in the whipped topping and crushed candy cane pieces. Spread this peppermint cheesecake mixture over the chilled Oreo crust and freeze for 10-15 minutes to firm it up.
-
Add the Chocolate Pudding Layer: In a separate bowl, whisk together the chocolate pudding mix and whole milk until it starts to thicken. Spread the pudding mixture evenly over the peppermint cheesecake layer, then chill the dessert until the pudding layer is fully set, about 1-2 hours.
-
Top and Chill: Once the pudding layer is set, spread the remaining whipped topping over the pudding. Chill the lasagna for at least 5 hours, or overnight for the best results.
-
Finish with Candy Canes: Just before serving, sprinkle the remaining crushed candy canes on top for a festive crunch.
Servings and Timing
- Servings: 12
- Prep Time: 20 minutes
- Chill Time: 5 hours
- Total Time: 5 hours 20 minutes
Variations
- Add Chocolate Chips: For extra texture and flavor, sprinkle mini chocolate chips over the top of the whipped topping layer before adding the crushed candy canes.
- Use Gluten-Free Oreos: For a gluten-free version, swap regular Oreos for gluten-free Oreos to keep the crust intact.
- Add a Layer of Mint Chocolate: If you prefer a more intense mint flavor, melt some mint chocolate and drizzle it over the peppermint cheesecake layer before adding the chocolate pudding layer.
- Use a Different Candy: For a twist, substitute the crushed candy canes with crushed peppermint bark, or use mini marshmallows for a softer topping.
Storage/Reheating
- Storage: Store leftovers in an airtight container in the fridge for up to 3 days.
- Reheating: This dessert is best served chilled, so there’s no need to reheat. Simply remove from the fridge a few minutes before serving if you prefer it slightly less cold.
FAQs
Can I make this dessert ahead of time?
Yes! This dessert actually benefits from being made ahead of time. It’s best to chill it for at least 5 hours, or overnight, to let the layers set.
Can I use a different cookie for the crust?
Yes! You can use other cookie varieties such as graham crackers or chocolate chip cookies if you prefer. Just be sure to adjust the amount of butter depending on the cookie’s texture.
Can I use a different type of whipped topping?
If you don’t have Cool Whip, you can use homemade whipped cream or any other store-bought whipped topping as a substitute.
Is this recipe gluten-free?
This recipe is not gluten-free if you use regular Oreos, but you can easily make it gluten-free by using gluten-free Oreos or another gluten-free cookie alternative.
How long can this dessert stay in the fridge?
This dessert can be stored in the fridge for up to 3 days. After that, the whipped topping and layers may start to lose their texture.
Can I freeze this dessert?
Yes! You can freeze the dessert for up to a month. Make sure to cover it tightly with plastic wrap or foil to prevent freezer burn.
Can I use sugar-free pudding mix for this recipe?
Yes! You can substitute sugar-free pudding mix if you want to reduce the sugar content. Just make sure to adjust the milk quantity as needed according to the package instructions.
How do I make sure the layers stay set?
The key to keeping the layers set is to chill the dessert for enough time—at least 5 hours, or overnight if possible. Freezing the cheesecake layer for 10-15 minutes before adding the pudding also helps the layers hold their shape.
Can I make this without the peppermint extract?
If you're not a fan of peppermint, you can leave out the peppermint extract. The candy canes will still give a minty flavor, but you can also swap in vanilla or another extract of your choice.
Can I serve this in individual portions?
Yes, you can serve this dessert in individual cups or jars for a fun presentation. Just layer the ingredients in smaller portions, ensuring each has a bit of each layer.
Conclusion
Chocolate Peppermint Lasagna is the perfect no-bake dessert for the holiday season. With its rich chocolate, creamy peppermint cheesecake, and crunchy candy cane topping, it's a festive treat that everyone will love. Plus, it's simple to make and can be prepared ahead of time, so you can spend less time in the kitchen and more time enjoying your holiday celebrations. Whether you’re hosting a Christmas party or just craving a festive dessert, this layered treat will definitely be a crowd-pleaser.

Chocolate Peppermint Lasagna
- Total Time: 5 hours 20 minutes
- Yield: 12 servings
- Diet: Vegetarian
Description
This festive no-bake Chocolate Peppermint Lasagna combines layers of Oreo crust, peppermint cheesecake, chocolate pudding, and whipped topping, all topped with crushed candy canes. It's the perfect holiday dessert for Christmas parties, potlucks, or family gatherings, offering the best of both chocolate and peppermint in every bite.
Ingredients
Ingredients:
Oreo Crust:
- 36 Oreo cookies
- ½ cup unsalted butter, melted
Peppermint Cheesecake Layer:
- ½ cup unsalted butter, softened
- 12 oz cream cheese, room temperature
- 1 ½ cups powdered sugar
- 1 tsp vanilla extract
- 1 tsp peppermint extract
- 1 ½ cups whipped topping (Cool Whip)
- ½ cup crushed candy canes
Chocolate Pudding Layer:
- 2 packages (3.9 oz each) instant chocolate pudding mix
- 2 ¾ cups whole milk
Topping:
- 2 ½ cups whipped topping (Cool Whip)
- ¼ cup crushed candy canes
Instructions
Instructions:
-
Prepare the Crust:
- Crush the Oreos in a food processor (including the filling) and combine with melted butter. Press the mixture firmly into the bottom of a 9x13-inch dish. Chill in the fridge while preparing the layers.
-
Crush the Candy Canes:
- Place candy canes in a zip-lock bag and crush them using a rolling pin for topping and the peppermint cheesecake layer.
-
Make the Peppermint Cheesecake Layer:
- Beat softened butter, cream cheese, powdered sugar, vanilla extract, and peppermint extract until smooth. Gently fold in whipped topping and crushed candy canes. Spread over the Oreo crust and freeze for 10-15 minutes.
-
Add the Chocolate Pudding Layer:
- Whisk together chocolate pudding mix and milk until thickened. Spread evenly over the peppermint cheesecake layer and chill for 1-2 hours until set.
-
Top and Chill:
- Spread the remaining whipped topping over the pudding layer and chill for at least 5 hours or overnight.
-
Finish with Candy Canes:
- Sprinkle the remaining crushed candy canes on top before serving for a festive touch.
Notes
- Storage: Store leftovers in an airtight container in the fridge for up to 3 days.
- Freezing: Can be frozen for up to 1 month. Ensure it’s wrapped tightly to prevent freezer burn.
- Make-Ahead: It’s best made ahead of time, chilling for at least 5 hours or overnight.
- Prep Time: 20 minutes
- Chill Time: 5 hours
- Category: Dessert
- Method: No-bake
- Cuisine: American

