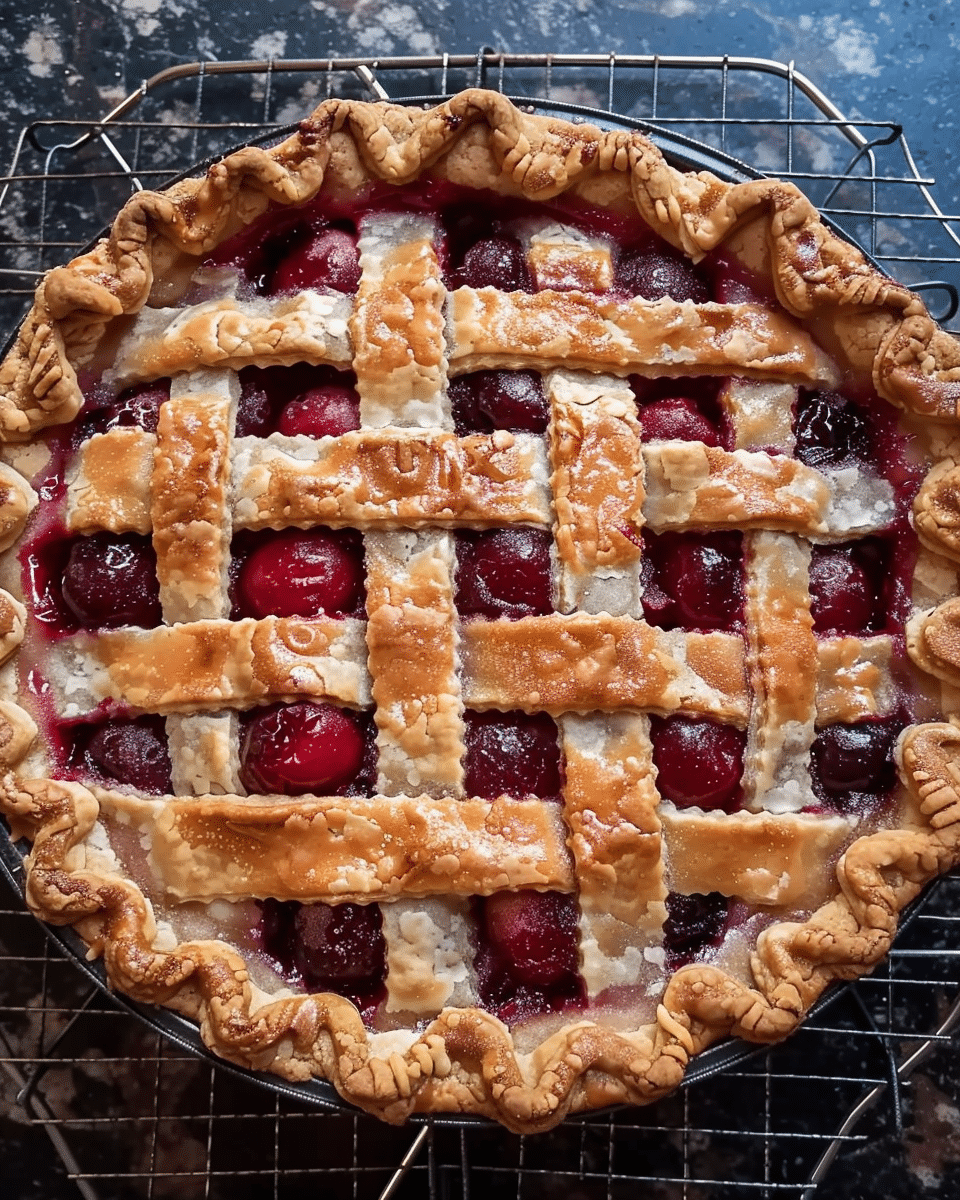
A classic homemade cherry pie with a flaky crust and sweet-tart filling that captures the essence of fresh cherries. This timeless dessert combines juicy cherries with hints of almond and vanilla for a perfectly balanced slice of nostalgia.
Why You'll Love This Recipe
This cherry pie recipe brings together the perfect balance of sweet and tart flavors in a traditional, homemade package. The double crust provides that satisfying contrast between flaky exterior and juicy interior, while the almond and vanilla extracts enhance the natural cherry flavor without overpowering it. It's an approachable recipe that delivers impressive results, making it perfect for both special occasions and weekend baking projects. The tapioca thickener ensures your filling sets beautifully without becoming gummy, giving you picture-perfect slices every time.
Ingredients
(Tip: You'll find the full list of ingredients and measurements in the recipe card below.)
Pastry for double crust pie creates the foundation for this classic dessert. You can use your favorite homemade pie crust recipe or a quality store-bought version if you're short on time. The double crust gives you that beautiful golden top with vents for steam to escape while baking.
Quick-cooking tapioca serves as the thickener for the cherry filling, absorbing excess juice while allowing the natural cherry flavor to shine through. Unlike cornstarch or flour, tapioca provides a clear, glossy filling that doesn't cloud the vibrant cherry color or add a starchy taste.
Salt enhances all the flavors in the pie and balances the sweetness. Even this small amount makes a noticeable difference in the final flavor profile.
White sugar sweetens the naturally tart cherries and helps create that perfect syrupy consistency. It dissolves during baking to distribute sweetness evenly throughout the filling.
Cherries are the star of this dessert. Fresh pitted cherries bring bright, juicy flavor that canned versions simply can't match. Sweet cherries work well, but a mix of sweet and tart cherries creates a more complex flavor profile.
Almond extract complements cherries perfectly with its subtle nutty aroma. This pairing is classic in cherry desserts because almond highlights the natural flavor of the cherries.
Vanilla extract adds depth and warmth to the filling, rounding out the flavor profile with its sweet, mellow notes that enhance the other ingredients.
Butter dotted across the filling before adding the top crust adds richness and helps create a silky texture as it melts into the cherry mixture during baking.
Directions
- Preheat your oven to 400 degrees F (205 degrees C). Place the bottom crust in a 9-inch pie pan, making sure it's evenly fitted. Set the top crust aside and keep it covered to prevent it from drying out.
- In a large mixing bowl, combine the tapioca, salt, sugar, pitted cherries, almond extract, and vanilla extract. Allow this mixture to stand for 15 minutes. This resting time is crucial as it gives the tapioca time to begin absorbing the cherry juices.
- After resting, pour the cherry filling into the bottom crust. Dot the surface evenly with small pieces of butter.
- Cover with the top crust and seal the edges by fluting or crimping them together. Cut several vents in the top crust to allow steam to escape during baking. For added appeal, you can create decorative cuts or a lattice pattern.
- Place the pie on a foil-lined cookie sheet to catch any potential drips during baking.
- Bake for 50 minutes in the preheated oven, or until the crust is golden brown and the filling is bubbling through the vents.
- Remove from the oven and place on a wire rack. Allow the pie to cool for several hours before slicing. This cooling time is essential for the filling to set properly.
Servings and Timing
This recipe yields one 9-inch pie that serves 8 people. The preparation takes about 30 minutes, while baking requires 50 minutes. Add approximately 2 hours of cooling time before serving, bringing the total time to about 3 hours and 20 minutes. For best results, allow the pie to cool completely before slicing to ensure the filling sets properly.
Variations
Cherry Berry Blend: Add 1 cup of blueberries, strawberries, or raspberries to the cherry filling for a mixed berry variation.
Citrus Cherry Pie: Add 1 tablespoon of lemon or orange zest to the filling for a bright, citrusy note.
Spiced Cherry Pie: Include ¼ teaspoon of cinnamon and a pinch of nutmeg for a warm, spiced version perfect for fall and winter.
Crumb-Topped Cherry Pie: Replace the top crust with a streusel topping made from butter, flour, sugar, and chopped nuts.
Amaretto Cherry Pie: Substitute the almond extract with 1 tablespoon of Amaretto liqueur for a more pronounced almond flavor.
Chocolate Cherry Pie: Sprinkle ½ cup of semi-sweet chocolate chips over the cherry filling before adding the top crust.
Storage/Reheating
Room Temperature: The baked cherry pie can be stored at room temperature, loosely covered with foil or plastic wrap, for up to 2 days.
Refrigeration: For longer storage, refrigerate the pie for up to 5 days. Cover loosely with foil to prevent the crust from becoming soggy.
Freezing: This pie freezes beautifully for up to 3 months. Allow the pie to cool completely, then wrap tightly with plastic wrap followed by aluminum foil or place in a large freezer bag.
Reheating: To reheat a refrigerated slice, warm in a 350°F oven for about 10 minutes or microwave for 20-30 seconds. For a frozen pie, thaw overnight in the refrigerator and then reheat in a 350°F oven for 15-20 minutes until warmed through.
Serving Suggestions: While delicious on its own, this cherry pie pairs wonderfully with vanilla ice cream, whipped cream, or a slice of sharp cheddar cheese for a classic combination.
FAQs
Can I use frozen cherries instead of fresh?
Yes, frozen cherries work well in this recipe. Thaw them first and drain most of the excess liquid to prevent a runny filling. You might need to increase the tapioca slightly (by about 1 tablespoon) to account for the extra moisture.
Why is my cherry pie filling runny?
Runny filling typically results from either not using enough thickener or not allowing the pie to cool completely before slicing. Make sure to measure the tapioca accurately and let the pie cool for at least 2 hours before cutting.
Can I substitute cornstarch for tapioca?
Yes, you can substitute cornstarch for tapioca, but use only 2 tablespoons of cornstarch instead of the 4 tablespoons of tapioca called for in the recipe. Cornstarch creates a slightly different texture but works effectively as a thickener.
How do I prevent a soggy bottom crust?
To prevent a soggy bottom, try blind baking the bottom crust for 10-15 minutes before adding the filling. Alternatively, brush the bottom crust with beaten egg white before adding the filling, or bake the pie on a preheated baking sheet or pizza stone.
What's the best way to pit fresh cherries?
A cherry pitter tool is the most efficient method, but you can also use a paperclip (unbend it and use the end to scoop out the pit) or press the cherry with the flat side of a knife until it splits, then remove the pit with your fingers.
Can I reduce the sugar in this recipe?
Yes, you can reduce the sugar to ¾ cup if you prefer a less sweet pie, especially if your cherries are particularly sweet. The sugar does help with preservation and texture, so significant reductions may affect more than just sweetness.
Why does my recipe call for letting the filling stand before baking?
The 15-minute standing time allows the tapioca to begin absorbing liquid from the cherries, which helps it thicken the filling more effectively during baking. It also gives the flavors time to meld together.
Can I make this pie ahead of time?
Yes, you can prepare the pie up to 24 hours in advance and refrigerate it unbaked. Alternatively, you can bake it, cool it completely, and store at room temperature for up to 2 days before serving.
What type of cherries work best for pie?
Tart cherries like Montmorency or sweet-tart varieties like Morello make excellent pies. Sweet cherries such as Bing or Rainier can also be used but may require a bit less sugar and perhaps a splash of lemon juice to balance the sweetness.
Is it necessary to use both almond and vanilla extracts?
While both extracts enhance the cherry flavor in complementary ways, you can omit one if necessary. The almond extract particularly complements cherry flavor, so if you only use one, almond is the preferred choice for this recipe.
Conclusion
This Baked Fresh Cherry Pie recipe delivers a timeless dessert that celebrates the natural flavor of cherries. The combination of a flaky, golden crust and juicy, perfectly sweetened filling makes this pie a standout dessert for any occasion. By following the detailed instructions and allowing proper cooling time, you'll achieve a picture-perfect pie with slices that hold their shape beautifully. Whether served on its own or with a scoop of vanilla ice cream, this cherry pie is sure to become a favorite in your recipe collection. The balance of sweet, tart, and subtle almond flavors creates a dessert that's both comforting and impressive – a true testament to the enduring appeal of homemade pie.

Baked Fresh Cherry Pie
- Total Time: 3 hrs 20 mins
- Yield: 1 9-inch pie
- Diet: Vegetarian
Description
A classic and delicious baked fresh cherry pie recipe with a double-crust pastry and a sweet, tangy cherry filling.
Ingredients
1 recipe pastry for a 9-inch double crust pie
4 tablespoons quick-cooking tapioca
⅛ teaspoon salt
1 cup white sugar
4 cups pitted cherries
¼ teaspoon almond extract
½ teaspoon vanilla extract
1 ½ tablespoons butter
Instructions
- Preheat oven to 400 degrees F (205 degrees C). Place bottom crust in pie pan. Set top crust aside, covered.
- In a large mixing bowl, combine tapioca, salt, sugar, cherries, and extracts. Let stand for 15 minutes.
- Pour the cherry mixture into the bottom crust and dot with butter.
- Cover with the top crust, flute the edges, and cut vents in the top crust.
- Place the pie on a foil-lined cookie sheet to catch any drips during baking.
- Bake for 50 minutes in the preheated oven until the crust is golden brown.
- Let the pie cool for several hours before slicing to allow the filling to set.
Notes
- Ensure the cherries are pitted before using them.
- Cooling the pie is essential to let the filling firm up properly.
- Line the baking sheet to avoid messes caused by drips while baking.
- Prep Time: 30 mins
- Cook Time: 50 mins
- Category: Dessert
- Method: Baking
- Cuisine: American
Nutrition
- Serving Size: 1 slice (⅛ of pie)
- Calories: 320
- Sugar: 30g
- Sodium: 200mg
- Fat: 12g
- Saturated Fat: 7g
- Unsaturated Fat: 4g
- Trans Fat: 0g
- Carbohydrates: 48g
- Fiber: 2g
- Protein: 3g
- Cholesterol: 20mg

